The GoPro name has become synonymous with action cameras and it’s likely you’ve seen some incredible video captured from these 4K cameras at some point online over the past few years. As we’ve recently covered, there’s never been a better time to add a GoPro to your flight bag to start recording your flights: they’re easy to use, the 4K picture quality is on par with professional video systems and the GoPro app for iPhone and iPad makes it easy to edit and share footage after your flight.
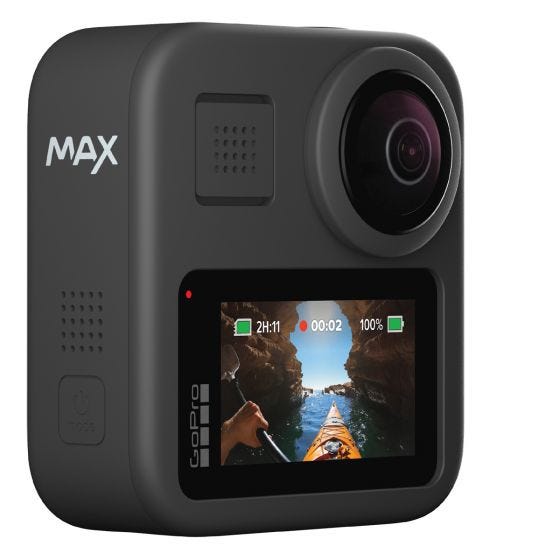 The next wave in small camera technology takes aviation videography to a new level, thanks to the 360° recording capabilities of the GoPro Max camera. Think of it as two GoPro cameras joined back to back, allowing it to capture literally everything around you, including the cockpit and the views outside, while keeping both perfectly exposed.
Why add a 360/VR camera to the cockpit?
This concept can be both confusing and intimidating at first, but thankfully GoPro makes both the recording and editing nearly effortless—as if you were using the familiar GoPro HERO camera.
Here’s the really cool part though: after recording a flight you really have two options on how to share the footage:
- Share the entire 360° recording right to YouTube (or other social video sites which accept 360 video). The YouTube video player displays controls on the screen which allow the viewer to pan around and interact with the video to select their preferred viewing angle. Here’s an example of this from a recent video we shot in collaboration with Patty Wagstaff in her Extra 300: https://youtu.be/XlqpAIUOlwU
- Crop out various angles from the 360°recordings using GoPro’s app and share it as a regular HD video online. Here’s an example from a recent trip skiing trip in Montana, where I mounted the camera on my helmet and then later “cropped” the preferred angle from each run down the mountain using the video editor in the free GoPro app for iPad: https://youtu.be/7Nz0dRgVKZs
At this point, you might again be thinking, this sounds like a lot of work—and is technically challenging. BUT take my word: it really is just as easy as using a regular GoPro camera, thanks to the well-designed GoPro app for iPad and iPhone.
The GoPro MAX is GoPro’s second-generation camera and was designed to eliminate all the hassles of using their original 360° camera, the GoPro Fusion. I’ll spare you the details, but the Fusion was particularly challenging to use, especially when it came time to edit and share video. GoPro learned from their experience with the Fusion, listened to customers, and designed the MAX to be the 360 camera for everyone, regardless of technical know-how. It also includes the Hypersmooth feature found in GoPro's newer HERO models, which we think is a must-have in the cockpit to eliminate engine and turbulence vibrations that used to ruin the video recorded from older cameras.
One other quick note on the GoPro MAX recording technology. You’ll often hear these cameras referred to as both 360 and VR (virtual reality) technology. They are really one and the same, but the difference comes down to how you actually view the video. The VR concept essentially means you could wear a VR headset (like an Oculus, or even an adapter for iPhone or Android which puts the screen right in front of your eyes) which includes accelerometers to automatically pan and tilt around in the recording as you move your head, presenting a more lifelike way to view the footage.
Getting Started
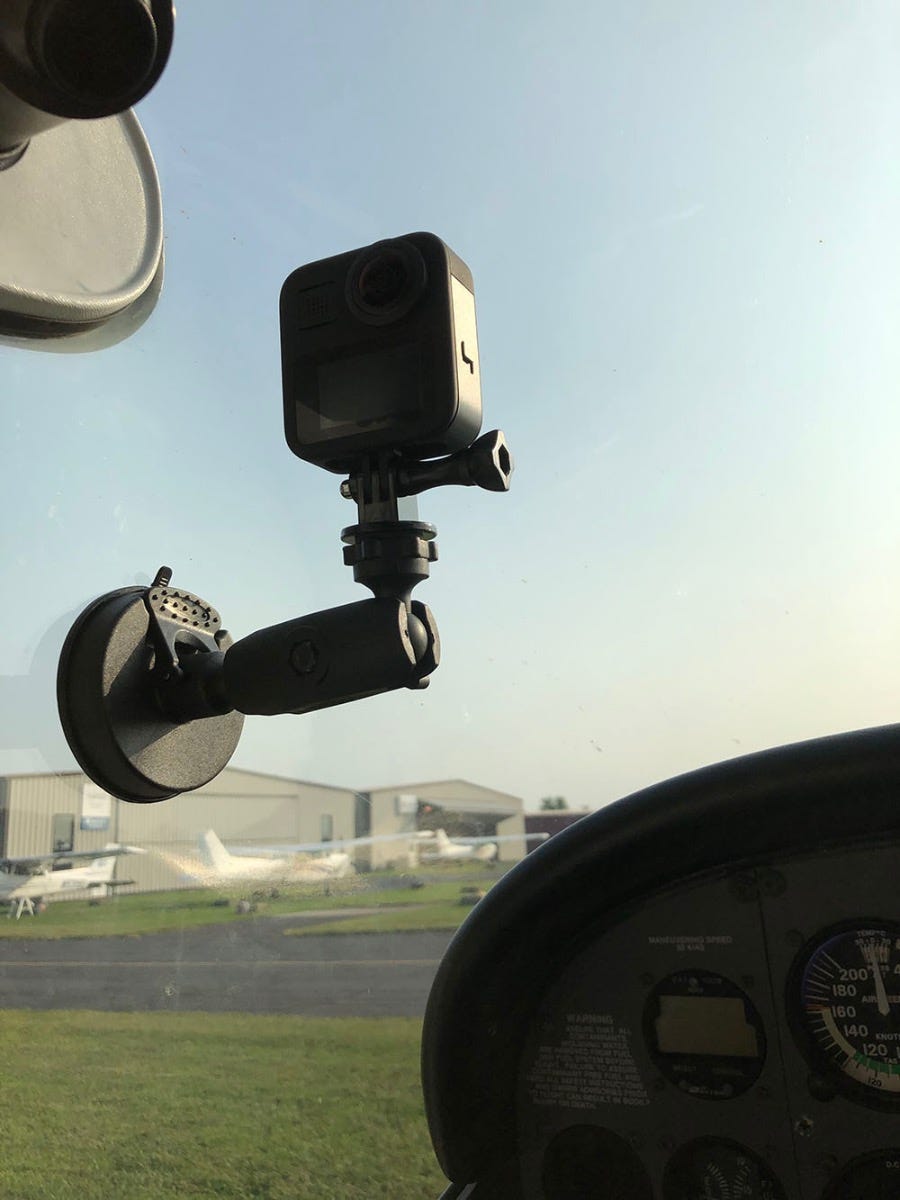 Flying with a GoPro means different things to different people and usage will vary greatly among pilots. Once you secure the camera in your preferred spot in the cockpit (or outside on the wing or fuselage), there’s literally nothing else to do besides press the record button. The camera automatically takes care of all the rest, so you can focus on flying and not get distracted with complicated camera controls. And thanks to the fact that the GoPro MAX is recording all around you, it’s nearly impossible to not get a perfect shot.
For those looking for a simple answer on how to get going with the GoPro Max, here is a bare-bones quickstart checklist:
- Charge the battery for 2 hours before first use
- Buy a memory card (the camera doesn’t come with one)
- Buy a suction cup mount for your interior window:
- Download the GoPro app
- Adjust the camera settings: RES | FPS - 5.6K | 30
Of course, there are many more customization options related to power, storage, mounting, video settings, audio recording, app integration and more for those who want to take their system further. Here’s a deep dive into all the options.
Battery Considerations
Like with most GoPro cameras, the MAX includes one battery with the camera. It will take about 2 hours to charge an empty battery, so factor in this time before your first use. To charge the battery, insert it into the camera by opening the side access door and then use the included USB-C charging cable with any standard USB wall or car charger (your iPhone or iPad charger will work if you don’t have an extra).
You can expect to get about 1 hour and 15 minutes of recording time on a full charge when in 360 mode. If you need additional recording time, your only practical option is to bring along extra batteries. Because the MAX records all angles around the camera (front/sides/back), you’ll need to leave the battery/charging door closed on the side to prevent it from blocking part of the shot, so plugging it into a USB charger during recording isn’t an option.
Pro Tip: Keep your GoPro MAX plugged in and on the charger at all times when not in use to ensure you have 100% battery life when needed before each flight.
MicroSD Card
The GoPro MAX camera does not include a memory card in the box, so you’ll need to buy one before you can use the camera. Like with all memory and storage, the price on MicroSD cards has never been cheaper, so this won’t be a big expense. To get technical, here are the specifications from GoPro when buying a memory card:
- microSD, microSDHCTM, or microSDXCTM
- Class 10 or higher UHS-I rating
- Capacity up to 256GB
While you can still buy 16 and 32 GB cards, I’d recommend at least a 64GB MicroSD card when using the GoPro MAX, which will give you about 2 hours of recording time at the max 4K recording resolution.
Pro Tip: Buy a card rated at U3 or higher with at least 128GB—these cards last forever, so the high-performance specs will help future-proof your purchase and meet the needs of more demanding cameras in the future.
Mounting
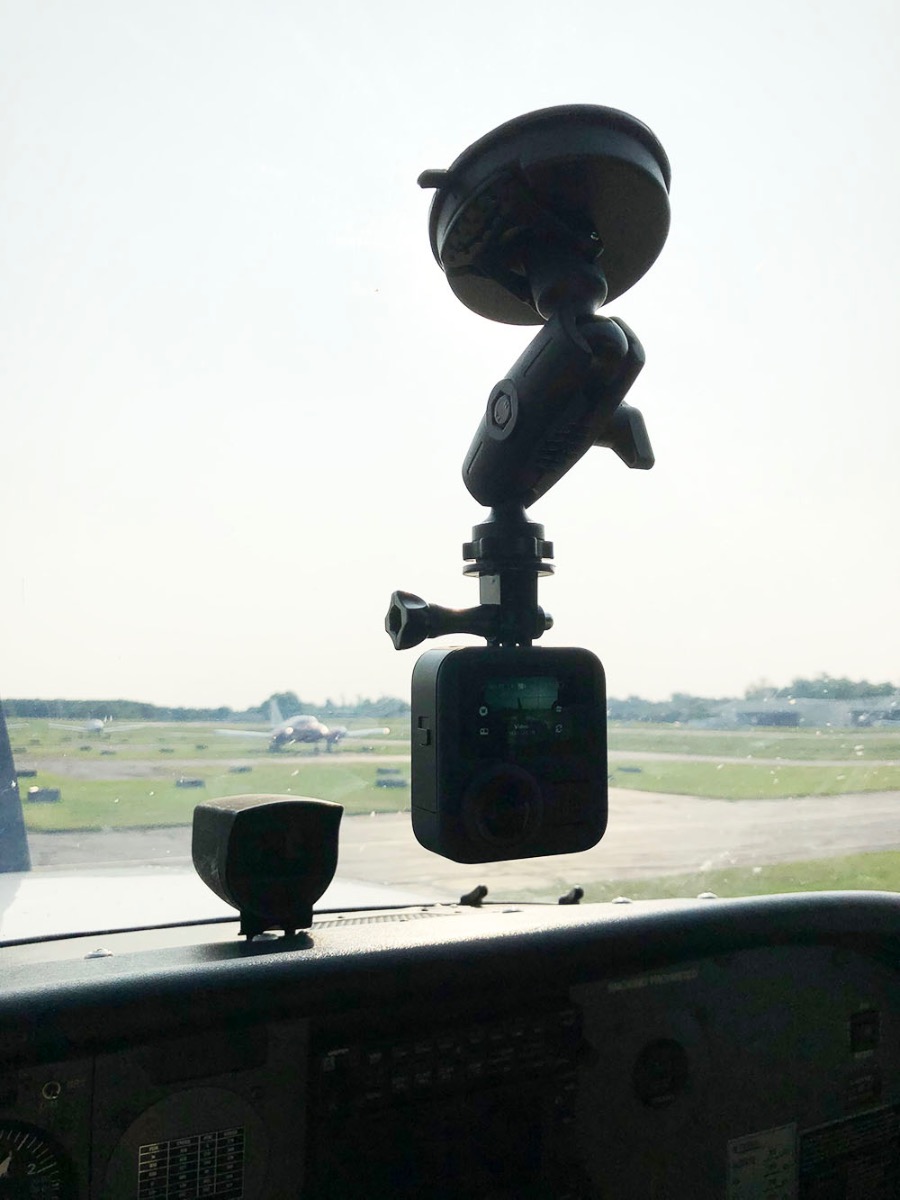 Camera mounting is one area where you’ll want to consider your aviation-specific needs and plan accordingly. The first consideration is to ask yourself – what do you want to shoot? When starting out most pilots want to capture the view out the front of the airplane, out the side window and back at them flying. Here’s where the GoPro MAX really shines—you can capture all these views at the same time with this camera.
Set it up in a position near the front window and you can capture all these angles together. The MAX includes the same mounting holes on the bottom of the camera as the regular HERO models, so all of your existing GoPro mounts will work. When mounting, pay attention to the location of the two lenses on the camera. The MAX intelligently stitches the two recordings together to create the single 360 video but you may see a very small amount of distortion on the seams. For this reason, if there is a specific part of the scene (e.g. the instrument panel, the pilots or the view out the front) you want to keep as sharp as possible, point one of the MAX’s lens in that direction.
While GoPro makes its own suction cup mount, I prefer to use a model that allows for more security and flexibility, like the Robust GoPro Suction Cup Mount. If you prefer RAM mounts, consider the RAM GoPro Suction Mount. Both incorporate dual ball joints, allowing you to rotate and aim the camera in an infinite number of positions.
If your airplane has exposed support structures in the cockpit, consider using a clamp style mount. I also find the clamp mount useful in larger airplanes with rigid glareshields, to shoot directly out the front.
Check out our GoPro HERO8 Pilot PIREP for more information about additional mounting options, including those that work on the exterior of the airplane.
Pro Tip: Once you purchase a suction cup mount (either the Robust or RAM type), you can easily add another attachment using the ball joint to switch to additional fixtures. I would suggest keeping both a suction cup and clamp mount in your flight bag for flexibility.
Using with GoPro App
You’ll want to download the free GoPro app for your iPhone, iPad or Android device when using the MAX. Not only can you adjust all camera settings and preferences from the app, it’ll serve as a real-time viewfinder to help frame your shots. Like with the camera itself, this app has come a long way from the early versions and is very reliable now. You can also use it to manage your video files, edit and share them.
GoPro also significantly improved its computer software for editing your footage on either a Mac or PC, so make sure to download that free program as well.
Pro Tip: The one area where I’ve experienced some reliability issues with all GoPro models (including the HERO8 and MAX) is starting and stopping the camera recording with the app. For this reason, I try to always use the physical start/stop button on the camera and make sure the beeps are set as loud as possible for aural feedback.
Camera Settings
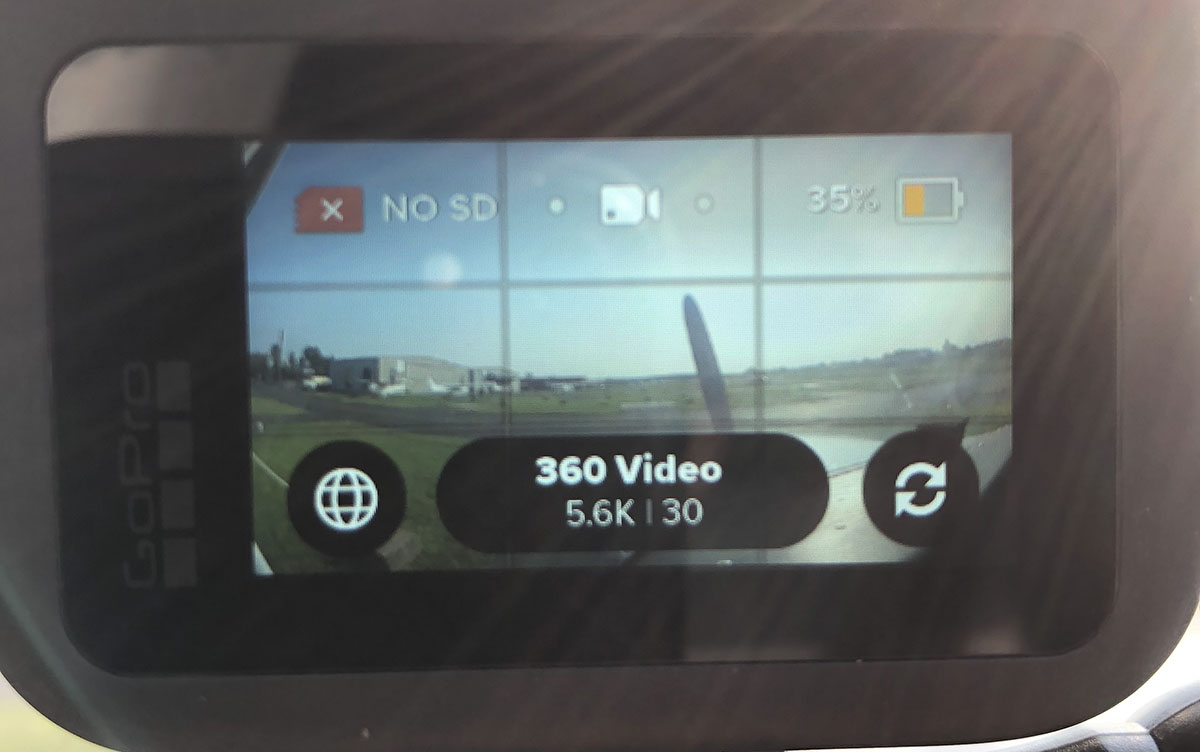 The GoPro MAX includes 2 separate shooting modes, 360 and HERO. 360 mode captures the full view around the camera, using both the front and rear cameras. The HERO mode captures video using just one of the two cameras, allowing you to record the same way you might use a GoPro 8 or 9 camera. You can toggle between the two modes using the button in the lower-left of the screen; when you see a sphere button, you’re in 360 mode. When it shows a rectangular camera button, you’re in regular HERO recording mode. Tap the displayed button to switch between modes
360 Recording Settings:
- As mentioned earlier, there aren’t many things you can change in 360 mode. Stick with the defaults here, 5.6K resolution and 30 FPS (frames per second).
- If you have a need for a higher frame rate at 60 FPS, you’ll need to lower the resolution down to 3K.
HERO Mode Settings
- Choose this mode if you’d prefer to just capture regular 16x9 HD footage using only the front or rear camera.
- There are two resolution options here: 1080 and 1440. While 1440 may sound like a higher quality option, skip this and stick with the 1080 (HD) resolution. 1440 mode is 4x3 aspect ratio and not the widescreen video you’re accustomed to seeing.
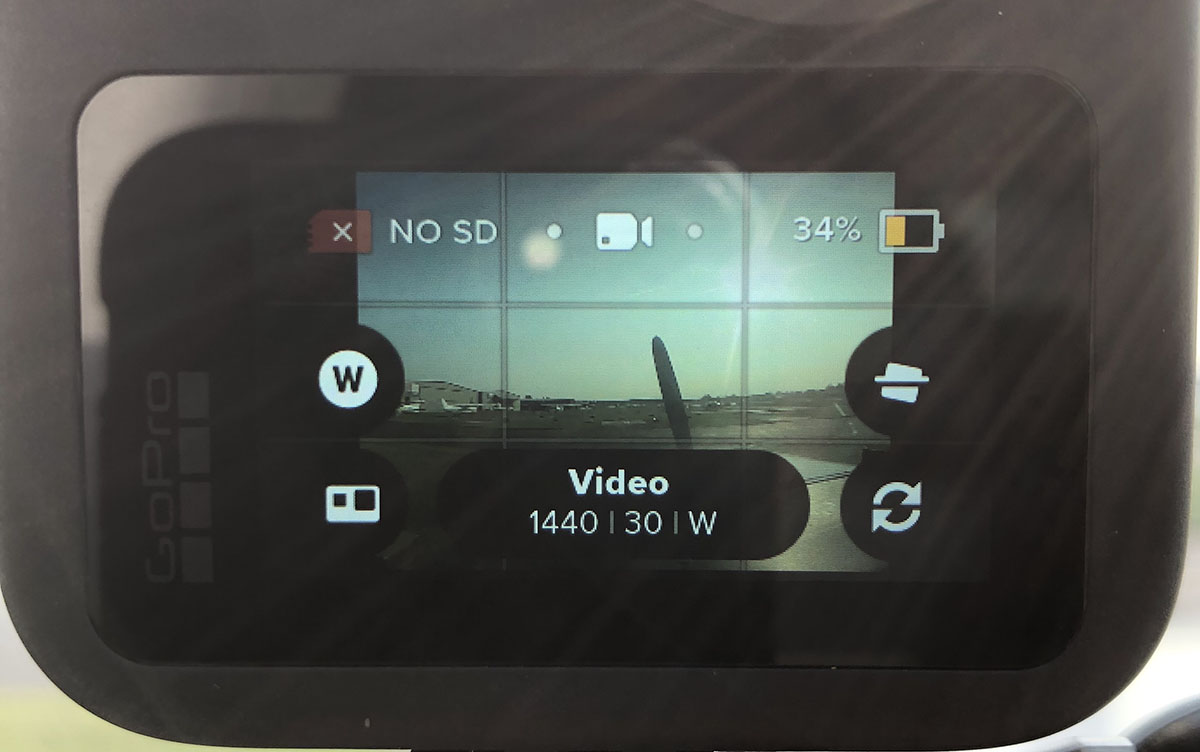 After using the camera in various airplanes, skiing and boating, I’d recommend sticking with the 360 mode all the time, since you can always edit the video later using the GoPro app and share a cropped HD video portion of the recording.
Pro Tip: Always get in the habit of looking at the lower left of the screen and verify you see the sphere icon when you want to record in 360 mode before hitting the record button—it’s easy to accidentally press this button and switch to regular HD recording when getting set up.
Other Considerations
Many pilots prefer to add an audio adapter cable to their GoPro HERO cameras to record ATC and intercom audio, but unfortunately the MAX cannot accept external audio input. You also won’t find prop distortion filters available, as the camera is set to record at a high shutter speed and adding filters to both lenses would cause problems with the video when you’re in motion in the airplane.


